
Use case
Rescue Photos After Water Damage
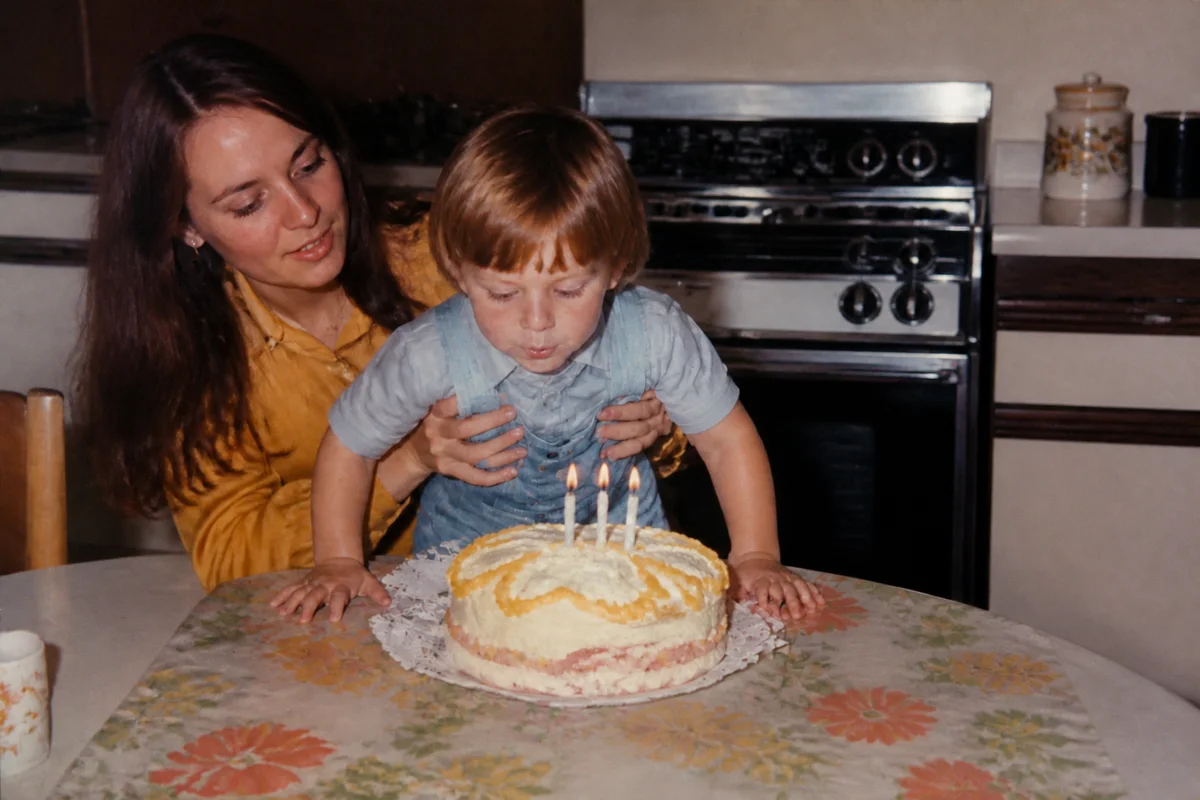
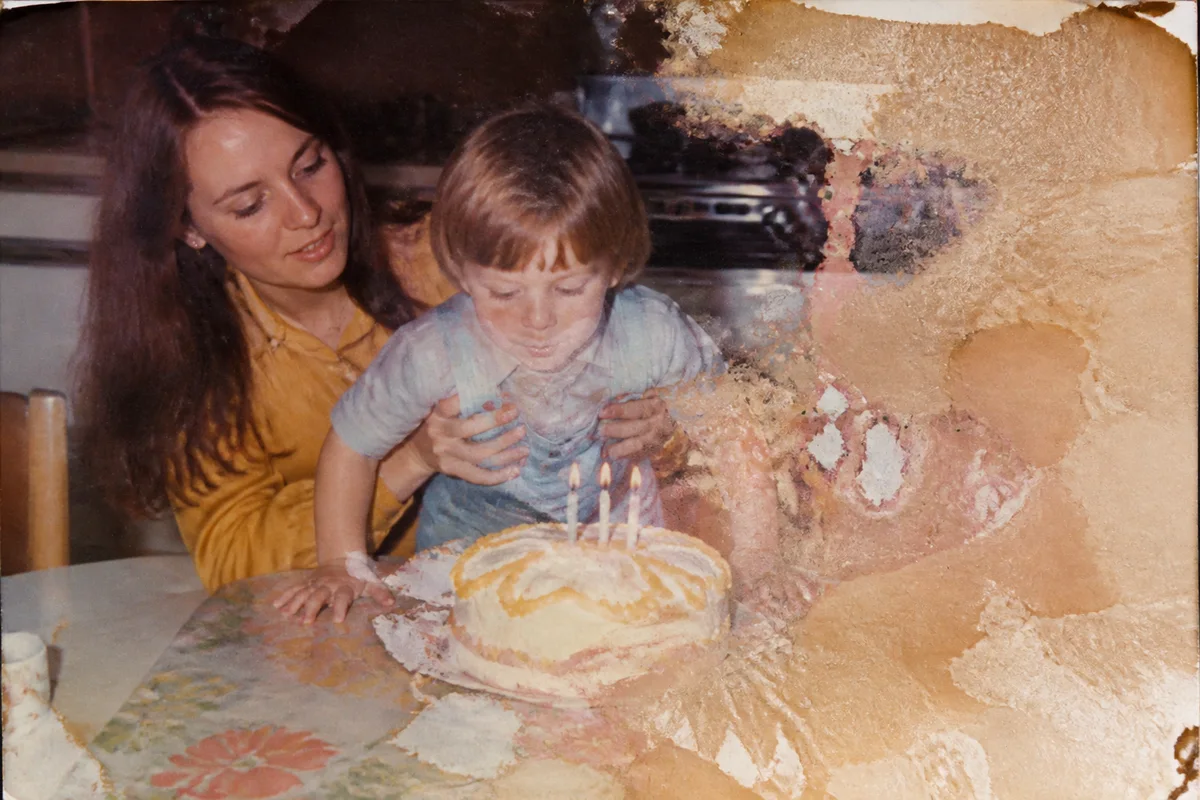
Watch the rescue unfold — pull the slider across.
A burst pipe, a flooded basement, a leaky attic — water finds photo boxes with cruel reliability. Prints stick together, emulsion lifts, and tide-line stains creep across faces. When the physical print is this far gone, the rescue happens digitally: capture what remains, and let AI rebuild the rest.
Scan or photograph each damaged print exactly as it is, stains and all. Restoration reconstructs the image beneath the blotches, repairs the areas where emulsion tore away, and evens out the discoloration the water left behind. What would take a conservator hours per print takes seconds here.
One practical note before you start: if prints are stuck together or still wet, look up safe handling first — gentle soaking and air-drying preserves more image for the scan. The more that survives physically, the more there is to work with digitally.
The problems this solves
- Tide-line stains and blotches cut right across faces and important details.
- Emulsion sticks to glass frames or neighboring prints and tears away when separated.
- Water leaves mottled discoloration that ordinary photo filters can't touch.
- Mold spots start growing wherever moisture lingered.
A workflow that works
Run full restoration on the scan
Restoration is built for exactly this — reconstructing image areas obscured by stains, tears, and lifted emulsion.
AI Photo RestorationRepair remaining marks individually
Stubborn tide lines or specks that survive the first pass can be cleaned up in a targeted second round.
AI Scratch RepairEven out the color
Water damage rarely discolors a print uniformly; correction brings the patchy areas back toward a consistent tone.
AI Color CorrectionSharpen the recovered detail
Once the damage is gone, a gentle sharpen helps the rebuilt areas sit naturally with the untouched ones.
AI Image SharpenerFrequently asked questions
The photo is partly destroyed. Can anything be done?
Often, yes. AI reconstruction fills damaged regions based on what surrounds them. The larger the missing area, the more the result is an educated reconstruction rather than a recovery — so review important details like faces closely, and keep the damaged original scan for reference.
Should I try to clean the physical print first?
Only with care. Dry surface dirt can be dusted gently, but rubbing a damp or damaged emulsion destroys detail permanently. When in doubt, scan it as-is — the AI works with whatever the scan captures.
Can I rescue a whole flooded box of photos?
Yes. Each photo takes seconds to process, so triage the box: scan everything, revive the irreplaceable ones first, and work through the rest in batches. New accounts start with 4 free credits to test the waters.
What resolution should I scan at?
600 DPI is a good target for standard prints — enough detail for restoration and reprinting without enormous files. A steady, well-lit phone photo is an acceptable substitute.
Related use cases